Ultimate Guide to RV Toilet Seal Replacements
Learn how to replace your RV toilet seal with our in-depth guide. Extend the life and efficiency of your RV toilet effortlessly.
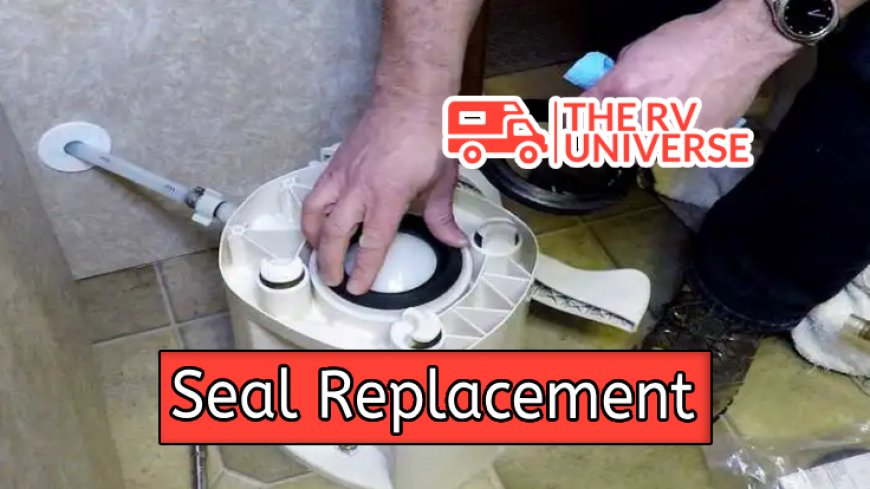
Embarking on an adventure in your RV comes with its own set of challenges, one of them being the necessity of RV toilet seal replacement. Keeping your RV toilet in top-notch condition is vital to maintaining hygiene and comfort on the road. Replacing the toilet seal may seem daunting, but with our comprehensive guide, you'll be equipped with knowledge and confidence to tackle this task effectively and efficiently.
Your Ultimate Handbook for RV Toilet Seal Replacement
Whether you're dealing with a leaking toilet, a stubborn seal, or you're just prepping your RV for the upcoming journey, engaging in pro-active maintenance routines like toilet seal replacement will save you from potential inconveniences.
Table of Contents
- Understanding the Importance of RV Toilet Seal Replacement
- Recognizing the Signs of a Worn-Out RV Toilet Seal
- Choosing the Right Seal for Your RV Toilet
- The In-Depth RV Toilet Seal Replacement Process
- Additional Tips and Tricks for a Smooth RV Toilet Seal Replacement
- Wrapping up: RV Toilet Seal Replacement Made Easy
Understanding the Importance of RV Toilet Seal Replacement
RV Toilet seals play a critical role in preserving the functionality and sanitation of your RV's plumbing system. Consistent and thorough maintenance of these components can help avoid larger, more costly problems down the road. Here are some prime reasons why RV toilet seal replacement is crucial:
- Preventing Leaks: A faulty seal can lead to toilet leakage, causing water damage within your RV.
- Maintaining Hygiene: A proper seal ensures a closed, secure toilet when not in use, reducing the risk of foul odors or bacteria spreading in your living space.
- Boosting Efficiency: Regular seal replacements ensure your RV toilet functions at its best, providing you with the convenience of a reliable, 'at-home' bathroom setup.
Recognizing the Signs of a Worn-Out RV Toilet Seal

Your RV toilet seal might be giving you signs of wear and tear. If you notice any of the following symptoms, it's probably time to consider a replacement:
- Odor: Persistent foul smell can be a clear sign of a failing seal.
- Leaks: Visible water around the base of the toilet or beneath the RV often indicates a defective seal.
- Inability to Hold Water: If the toilet bowl doesn't hold water as it should, the seal likely needs replacing.
Choosing the Right Seal for Your RV Toilet
Picking the right seal is an important step. Here are some factors to consider:
- Compatibility: Check the manufacturer's specifications to ensure the new seal fits your RV toilet model.
- Quality: Invest in a high-quality seal to avoid frequent replacements. Remember, an expensive seal can be cost-effective in the long run.
Top RV Toilet Seal Brands
Consider popular and reliable brands when you shop. Some of the well-known names in the RV toilet industry include Thetford, Dometic, and Camco. Do your research to find a seal that complemo your RV toilet and meets your budget
The In-Depth RV Toilet Seal Replacement Process
Replacing an RV toilet seal isn't rocket science. You'll need patience, the right tools, and a careful approach. Here's a decent breakdown of the steps you should follow:
- Prepare Your Work Area: Ensure you've emptied the waste tank, shut-off water supply, and gathered all necessary tools. You'll need a new seal, wrench, cleaning cloth, and gloves.
- Remove the Toilet: Disconnect the water line connected to the toilet. After that, use a wrench to remove the bolts fixing the toilet to the floor. Once loosen, carefully lift the toilet to access the seal.
- Clean and Inspect: Once the toilet is removed, take a moment to clean the flange and inspect it for any damage. If needed, replacement parts can often be ordered from the toilet's manufacturer.
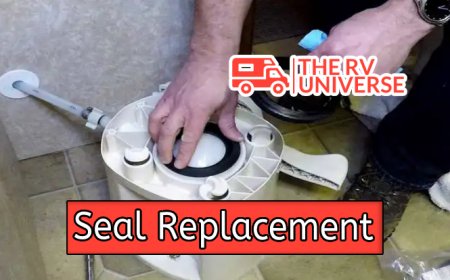
- Replace the Seal: Now, place the new seal in the spot of the old one. Ensure that it's fitted correctly and looks identical to when the old one was in place.
- Reinstall the Toilet: Once the new seal is in place, the toilet can be replaced. Secure it with the bolts and reconnect the water line. Make sure the toilet is firm and doesn't rock.
- Test the New Seal: Once reassembled, put the new seal to the test. Fill the toilet bowl with water and check for any leaks. If there are no leaks, congratulations - you've successfully replaced your RV toilet seal!
Additional Tips and Tricks for a Smooth RV Toilet Seal Replacement

While replacing an RV toilet seal is fairly straightforward, here are a few extra tips to ensure a smoother process:
- Use Quality Tools: Don't skimp on your tools! A sturdy, reliable wrench, for example, can prevent damage to your toilet's hardware.
- Prioritize Safety: Always remember to turn off the water line and ensure that the waste tank has been emptied prior to starting your work.
- Never Rush: Always take your time during the seal replacement process. Rushing could lead to mistakes, which could result in even more repairs.
Easing the Task: RV Toilet Seal Lubricant
Another often overlooked tip is the use of toilet seal lubricant. Regularly applying a specially designed product, like Thetford's Toilet Seal Lubricant and Conditioner, preserves the flexibility of the seal, preventing leaks and extending its lifespan. Remember to only use products marked safe for RV toilets and never use petroleum-based lubricants as they can deteriorate the seal.
Wrapping up: RV Toilet Seal Replacement Made Easy
In conclusion, don’t let a worn-out seal put a stink on your RV adventure. Even though RV toilet seal replacement might seem like a chore, with the right tools and this comprehensive guide, it can become a routine part of your RV maintenance. Recognize the signs, choose the right seal, understand the process, and apply the tips we’ve discussed.
Remember, your journey in the vast world of RVs goes beyond the roads you travel. It's also about understanding and taking care of your vehicle. At TheRVUniverse.com, we’re committed to making your RV experience the best it can be. So here’s to smooth travels and an RV toilet that functions perfectly!
What's Your Reaction?


